Apply Custom Parameter Group
We are now going to apply this custom parameter group to our primary and replica instances.
Click on the Databases menu on the left and select the radio button next to rdspg-fcj-labs and click on Modify at the top.
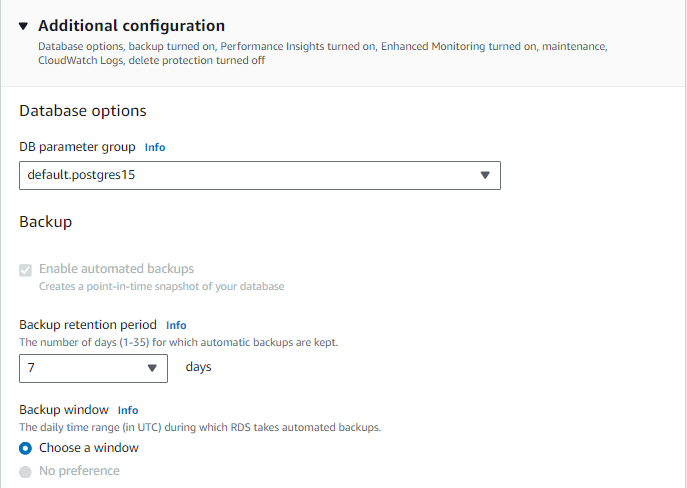
Scroll down to Additional Configuration->Database options and choose the custom parameter group that you previously created in your account (e.g. custom-pg) as shown below.
Scroll down to the bottom and click on Continue.
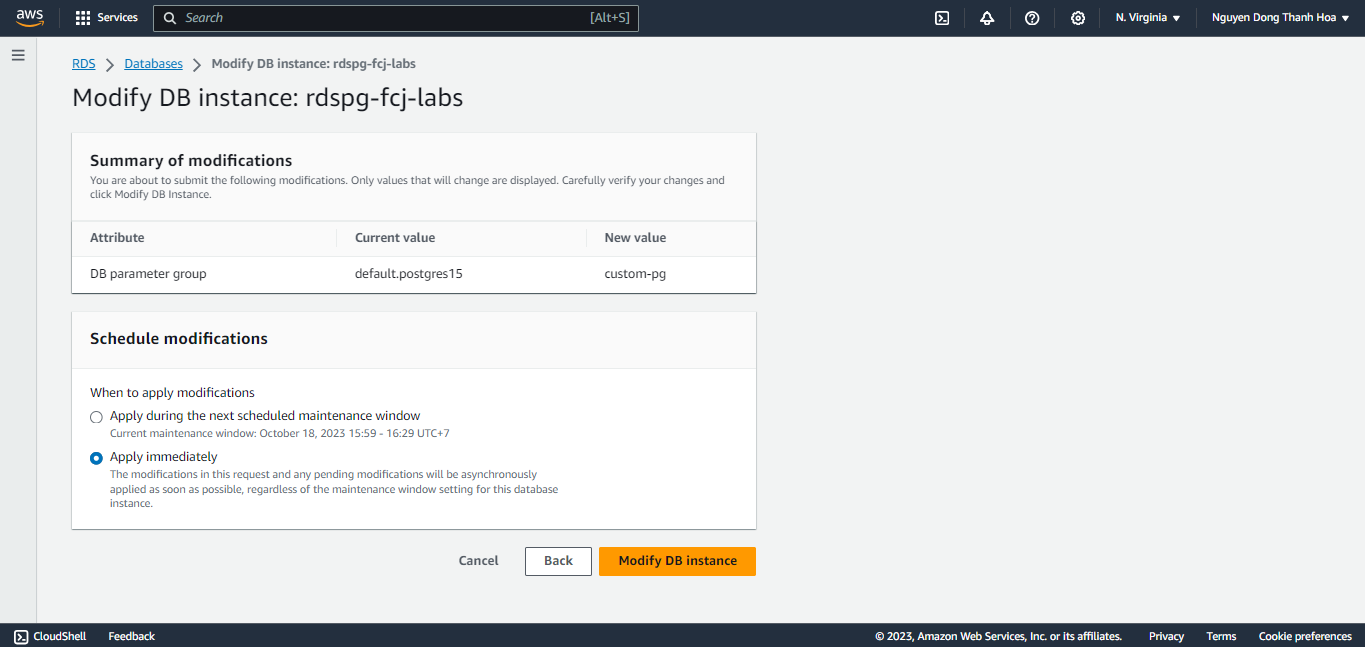
In the next section, choose Apply Immediately as shown below.
Select the radio button next to the DB identifier rdspg-fcj-labs as shown below and verify that the Status of the database is Modifying.

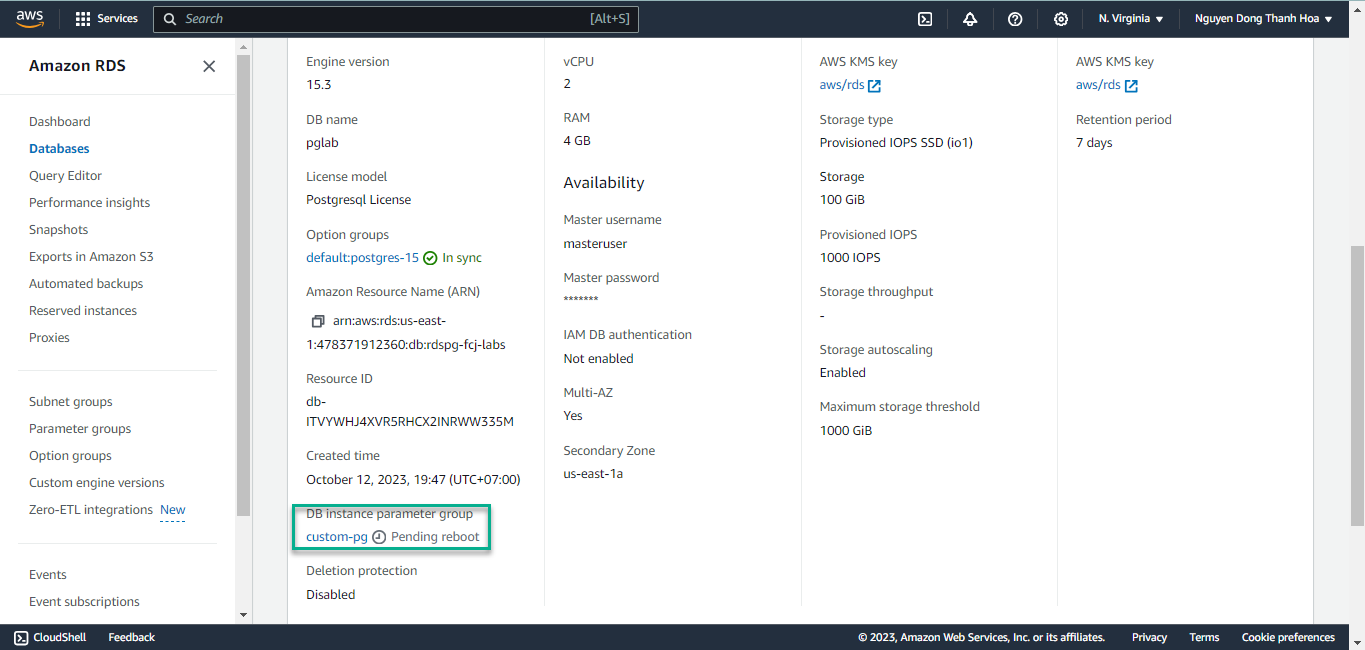
Certain parameter changes require a reboot of the RDS instance, hence you can verify if a reboot is required by selecting the primary instance rdspg-fcj-labs and under the Configuration tab, on the bottom left against the modified parameter group (custom-pg) you will see a Pending reboot written indicating a need for the instance to be rebooted in order for the changes to be applied. ( The same can be verified for the replica instance too. )
So, you will have to reboot instances for the Parameter group to become active ( In-sync ).
By selecting the database rdspg-fcj-labs, and by going under the Configuration tab, you can now see after rebooting the instance, the parameter group dispalys to be In Sync.

(OPTIONAL) AWS CLI
Alternatively you can apply the custom parameter group using the AWS CLI as shown below:
You can optionally verify the parameter changes from psql command line. To do so, connect to the instance :
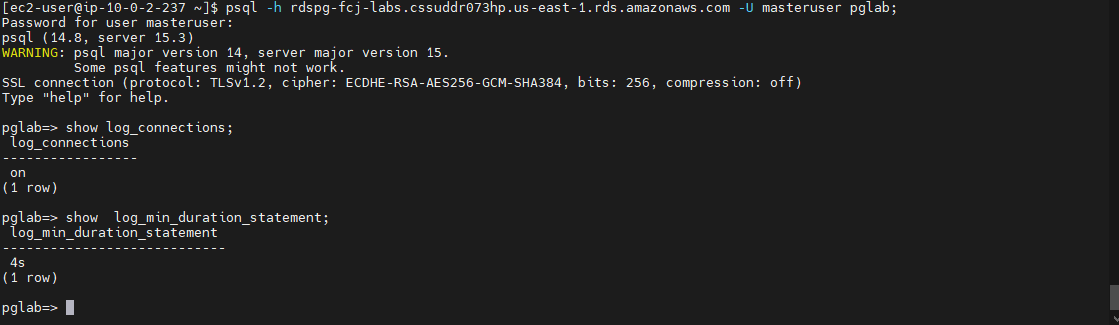
psql -h rdspg-fcj-labs.cssuddr073hp.us-east-1.rds.amazonaws.com -U masteruser pglab
Then run the following commands
show log_connections;
show  log_min_duration_statement;
The ouput would look like below:
Congratulations, you’ve made it to the end of the Parameter Groups lab.